Redis Enterprise as an active-active database is ideal for geo-distributed apps. Its architecture is based on breakthrough academic research surrounding conflict-free replicated data types (CRDT). This approach offers many advantages over other active-active databases, including:
Recently, we published a tutorial on how to develop apps using active-active Redis Enterprise. In order to simulate the production setup, developers or testers need a miniaturized development environment — something that’s easy to create with Docker.
Redis Enterprise is available on the Docker hub as redis/redis, and we’ve shared detailed step-by-step instructions on how to set up Redis Enterprise on Docker on the Redis Enterprise documentation page and the docker hub itself.
In this blog, we’ll walk you through the steps to create your Docker-based Redis Enterprise cluster — all through the command line. Here’s a high-level overview of the process (more details below):
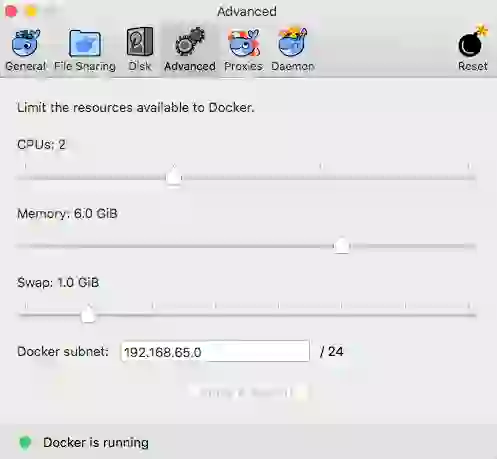
Before you start, make sure you have a bash shell in place, and enough memory allocated to your docker processes. You can check your memory by going to Docker -> Preferences -> Advanced.
The following script creates a CRDT-based Redis Enterprise database on a 3-node cluster. Save this in a file and give it a name, like “create_3_node_cluster.sh. Then change the mode to executable (chmod +x create_3_node_cluster.sh), and run the script ([path]/create_3_node_cluster.sh).
#!/bin/bash
# Delete the bridge networks if they already exist
docker network rm network1 2>/dev/null
docker network rm network2 2>/dev/null
docker network rm network3 2>/dev/null
# Create new bridge networks
echo “Creating new subnets…”
docker network create network1 –subnet=172.18.0.0/16 –gateway=172.18.0.1
docker network create network2 –subnet=172.19.0.0/16 –gateway=172.19.0.1
docker network create network3 –subnet=172.20.0.0/16 –gateway=172.20.0.1
# Start 3 docker containers. Each container is a node in a separate network
# These commands pull redis/redis from the docker hub. Because of the
# port mapping rules, Redis Enterprise instances are available on ports
# 12000, 12002, 12004
echo “”
echo “Starting Redis Enterprise as Docker containers…”
docker run -d –cap-add sys_resource -h rp1 –name rp1 -p 8443:8443 -p 9443:9443 -p 12000:12000 –network=network1 –ip=172.18.0.2 redis/redis
docker run -d –cap-add sys_resource -h rp2 –name rp2 -p 8445:8443 -p 9445:9443 -p 12002:12000 –network=network2 –ip=172.19.0.2 redis/redis
docker run -d –cap-add sys_resource -h rp3 –name rp3 -p 8447:8443 -p 9447:9443 -p 12004:12000 –network=network3 –ip=172.20.0.2 redis/redis
# Connect the networks
docker network connect network2 rp1
docker network connect network3 rp1
docker network connect network1 rp2
docker network connect network3 rp2
docker network connect network1 rp3
docker network connect network2 rp3
# Sleep while the nodes start. Increase the sleep time if your nodes take
# longer than 60 seconds to start
echo “”
echo “Waiting for the servers to start…”
sleep 60
# Create 3 Redis Enterprise clusters – one for each network. You can login to
# a cluster as https://localhost:8443/ (or 8445, 8447). The user name is
# r@r.com, password is password. Change the user
echo “”
echo “Creating clusters”
docker exec -it rp1 /opt/redis/bin/rladmin cluster create name cluster1.local username r@r.com password test
docker exec -it rp2 /opt/redis/bin/rladmin cluster create name cluster2.local username r@r.com password test
docker exec -it rp3 /opt/redis/bin/rladmin cluster create name cluster3.local username r@r.com password test
# Create the CRDB
echo “”
echo “Creating a CRDB”
docker exec -it rp1 /opt/redis/bin/crdb-cli crdb create –name mycrdb –memory-size 512mb –port 12000 –replication false –shards-count 1 –instance fqdn=cluster1.local,username=r@r.com,password=test –instance fqdn=cluster2.local,username=r@r.com,password=test –instance fqdn=cluster3.local,username=r@r.com,password=test
Run redis-cli on ports 12000, 12002 and 12004 to verify that you can connect to all three Redis Enterprise nodes. If you are connecting your app to Redis Enterprise, you will need three instances of your app connecting to the three different ports. For example:
$ redis-cli -p 12000
127.0.0.1:12000> incr counter
(integer) 1
127.0.0.1:12000> get counter
“1”
Splitting the networks helps you to introduce “network partition” between Redis Enterprise replicas. When you design your app, you must design it to work seamlessly when the replicas are disconnected. This script helps you to isolate the three replicas. Save this script in the file “split_networks.sh”, and change the mode to make it executable (chmod +x split_networks.sh) before running it.
#!/bin/bash
docker network disconnect network2 rp1
docker network disconnect network3 rp1
docker network disconnect network1 rp2
docker network disconnect network3 rp2
docker network disconnect network1 rp3
docker network disconnect network2 rp3
When you run the script “split_netorks.sh”, the local replicas will stop sharing their database updates with their peers. Restoring the connection will enable them to exchange all updates and arrive at the same final state, thanks to the strong eventual consistency offered by Redis Enterprise. The script below restores network connections between the replicas. Save this in a file “restore_networks.sh”, and change the mode to make it executable (chmod +x restore_networks.sh).
#!/bin/bash
docker network connect network2 rp1
docker network connect network3 rp1
docker network connect network1 rp2
docker network connect network3 rp2
docker network connect network1 rp3
docker network connect network2 rp3
When you are done with your development and testing, you could stop all three nodes of Redis Enterprise by running the following script. Save the script in a file, name it “stop.sh”, and change the mode to make it executable (chmod +x stop.sh).
#!/bin/bash
docker stop rp1 rp2 rp3
docker rm rp1 rp2 rp3
docker network rm network1
docker network rm network2
docker network rm network3
That’s it. With this as a starting point, you now have your very own Docker-based Redis Enterprise active-active setup. If you have any questions, feel free to email us at product@redis.com.
If you are looking to get started with Redis Enterprise in the cloud, you can sign up for free here.